
How to make GIF animation in Photoshop (CS6). Step-by-step tutorial
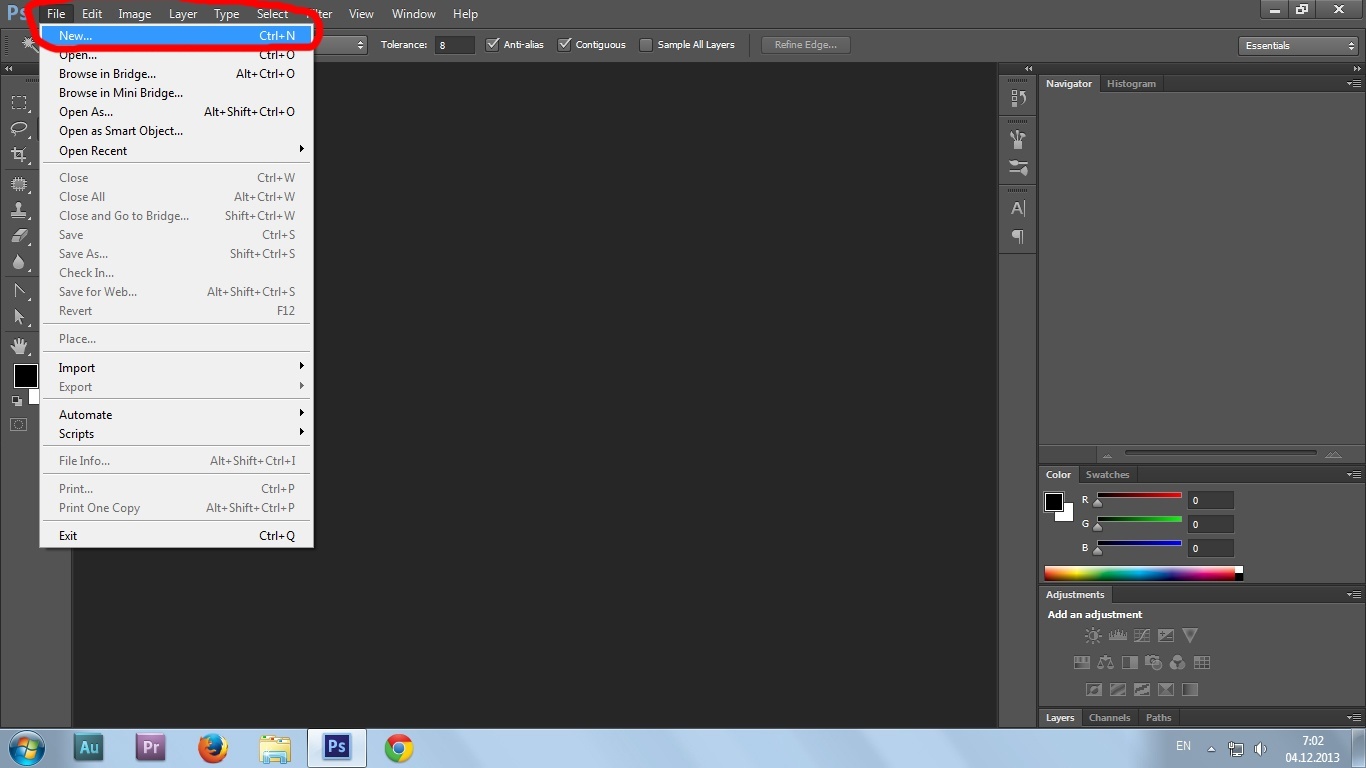
1. Create a new document
File > New
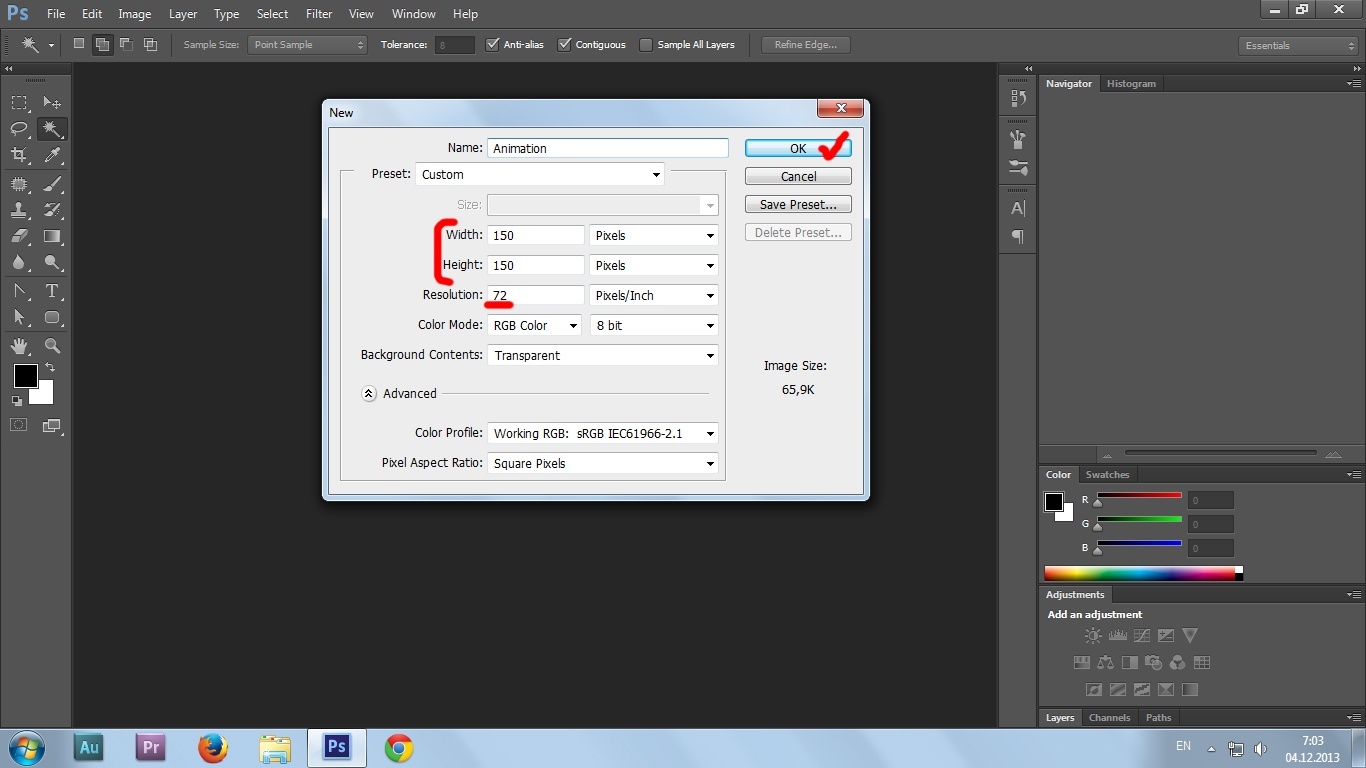
2. Set document size
In the opened window, set the size of the document. Here we make it 150×150 pixels.
Resolution: 72 pixels/inch. – appropriate for web.
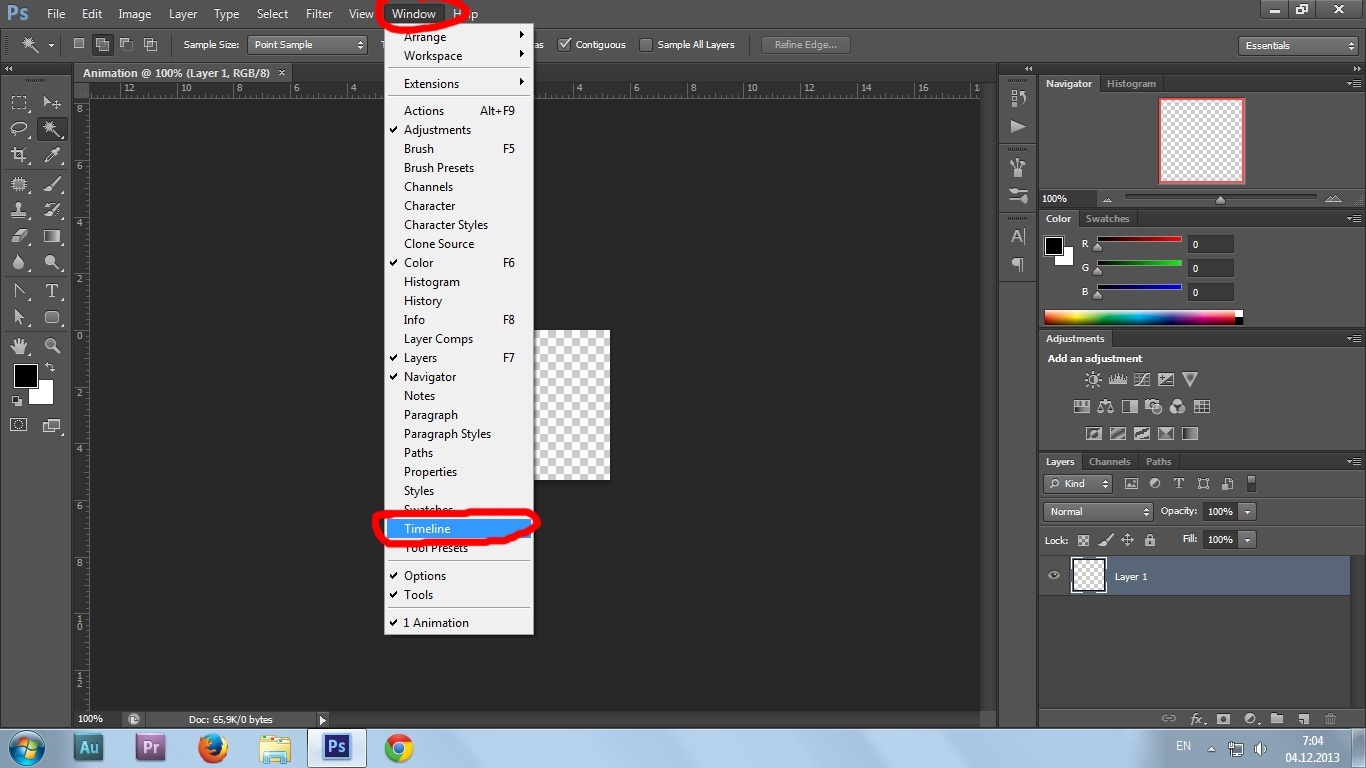
3. Enabling Timeline
For animation we need to see a Timeline, where will be our future slides.
To make Timeline visible go to Window > Timeline.
It will appear in the bottom of the working space.
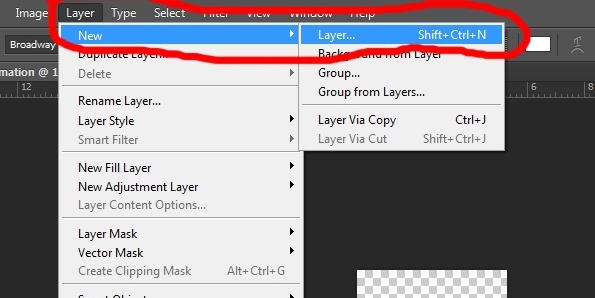
4. Creating New Layers
Create two new layers. For that, go to Layer > New > OK,
or press combination of Shirt+Ctl+N two times.
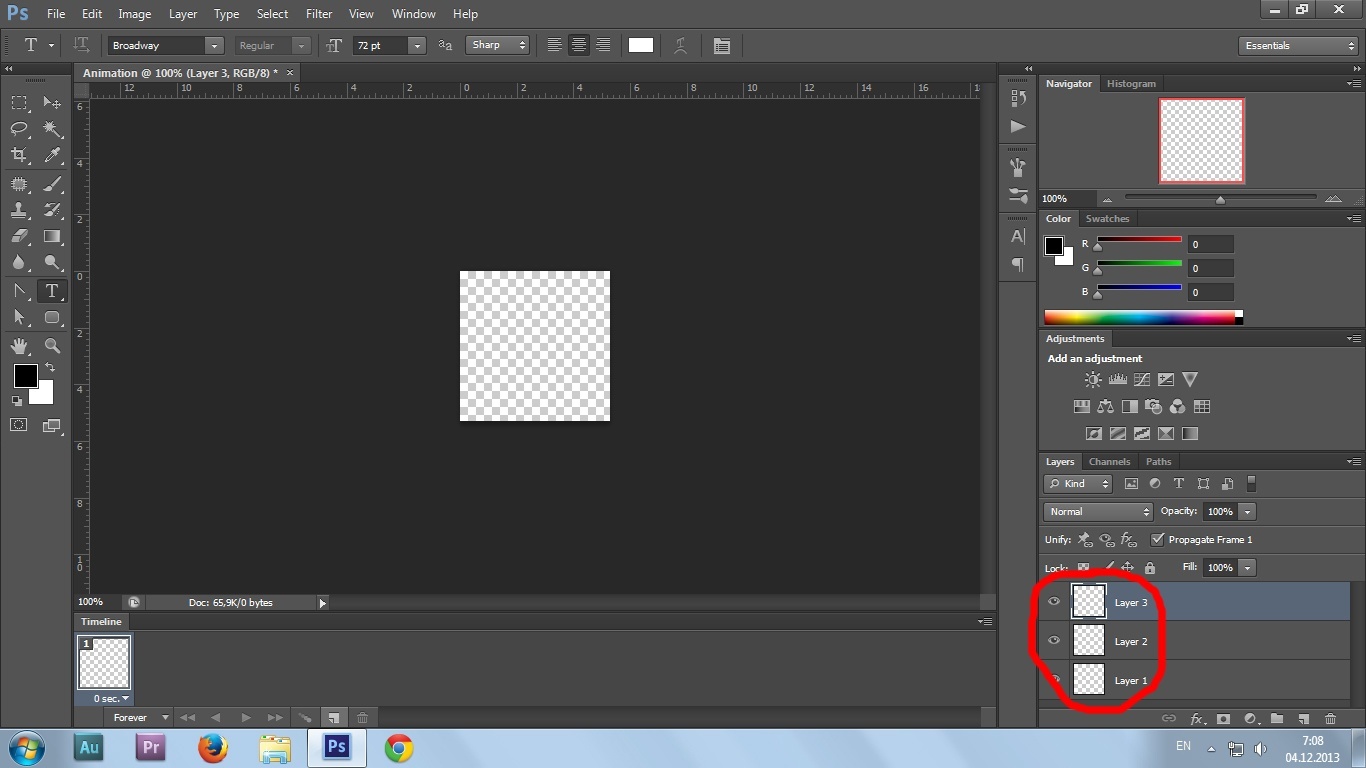
5. Three Layers
Now we have three empty layers. On these layers will be images of our slides.
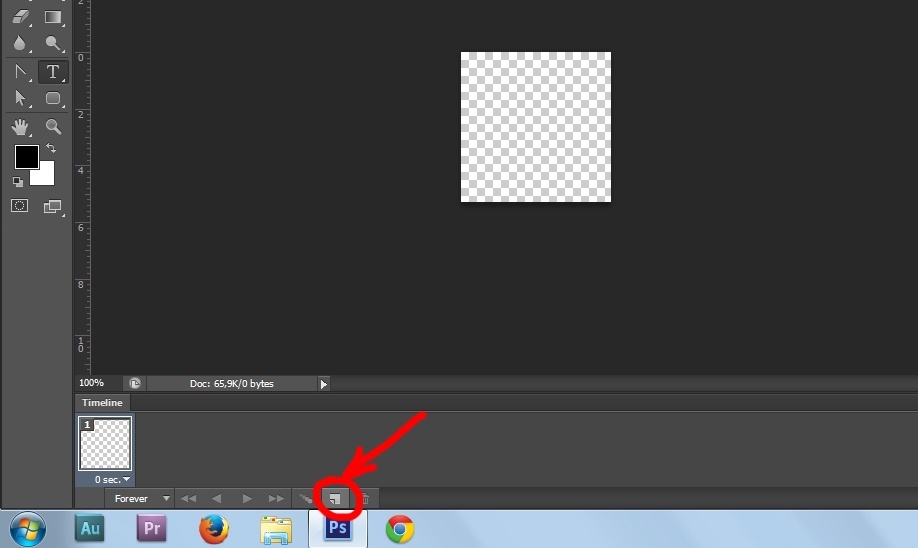
6. Creating new Frames on Timeline
As you can see on the previous picture, on Timeline there is only one frame.
As we have three layers, we need three frames as well.
To create a new frame, click on the sign below on Timeline as shown on the picture below.
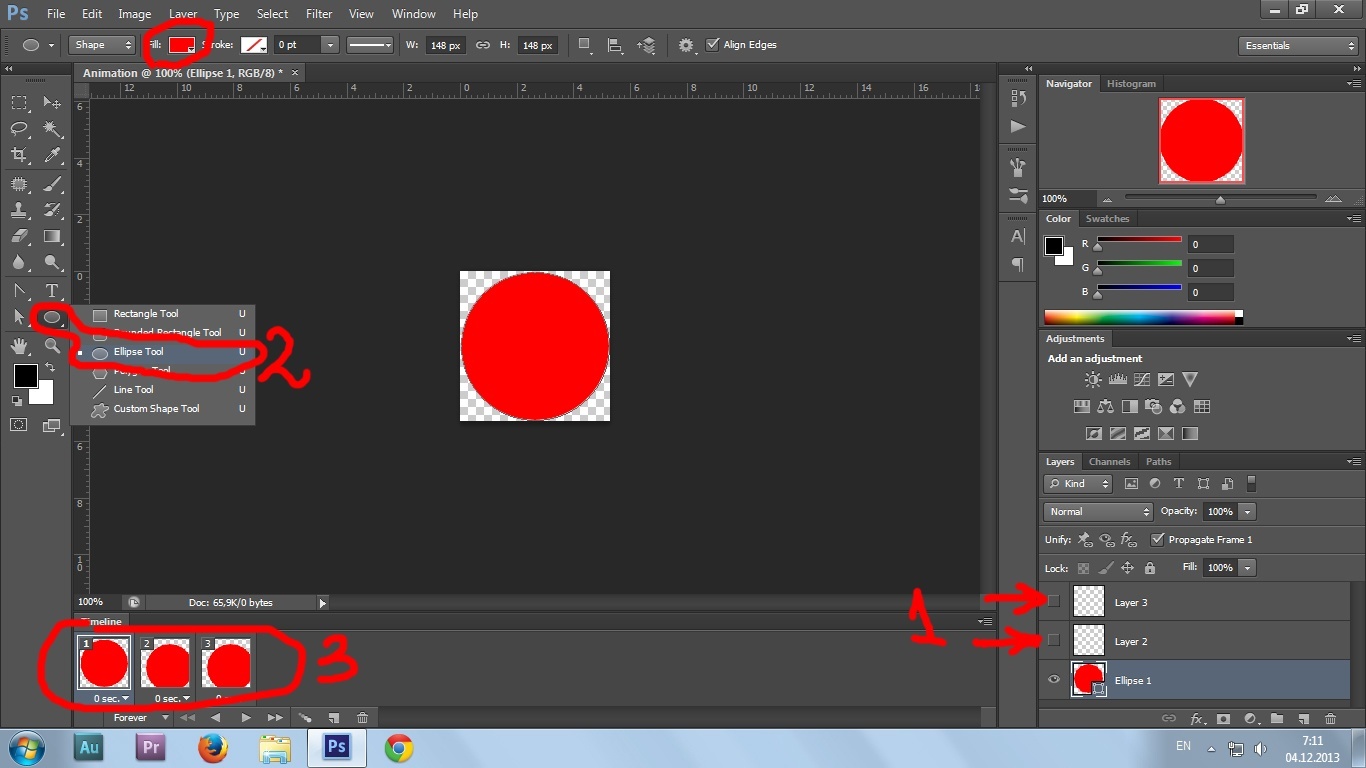
7. Creating Object on Layer 1
Now, we’re going to create an object on Layer 1.
First, deactivate Layer 2 and Layer 3 by clicking on the eye near the layer icon.
Now we can create an object on Layer 1. Let’s take an ellipse. We can choose a fill colour from the upper menu.
We can see now that in all our frames of Timeline, an ellipse appeared which we placed on Layer 1.
8. Creating Objects on Layer 2 and Layer 3
Now let’s create ellipses of different colours on Layer 2 and Layer 3.
For that, activate again those layers by clicking on the “eye” sign near the layer icon.
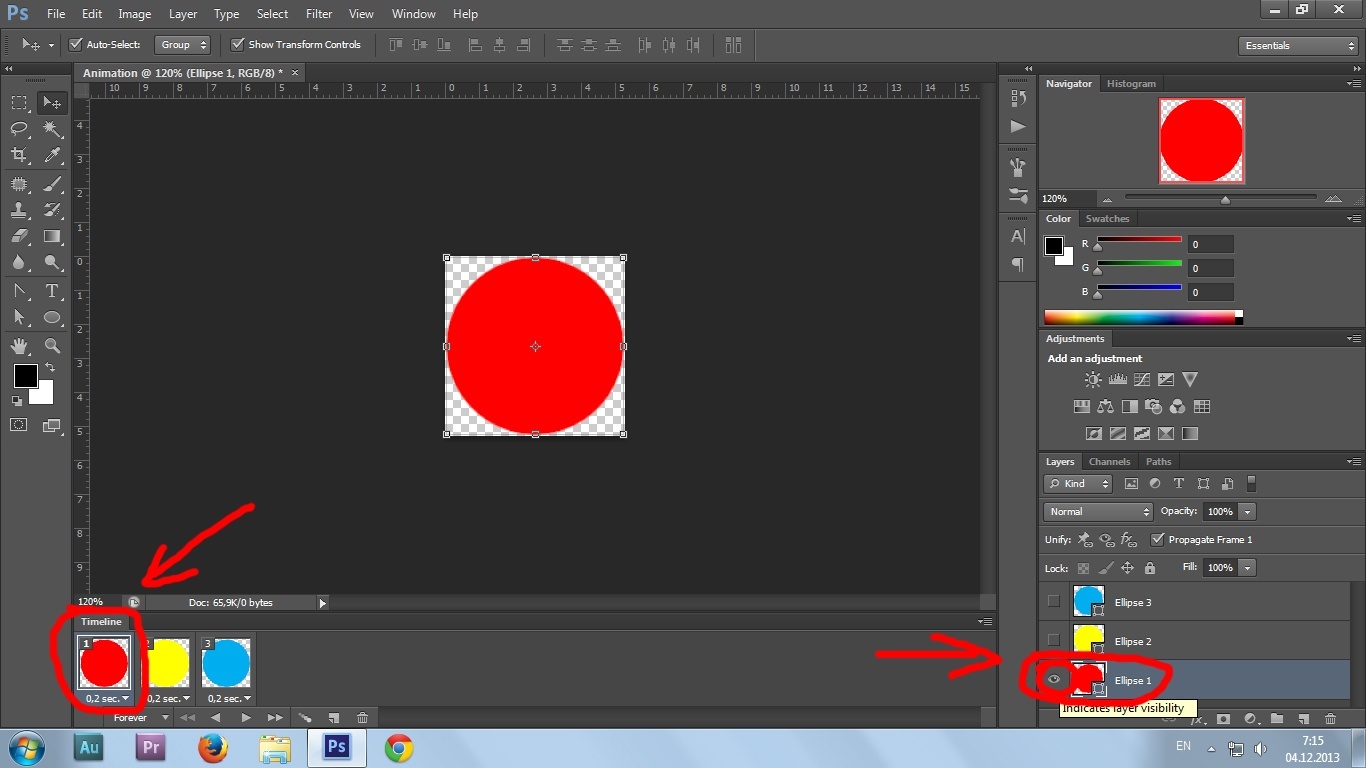
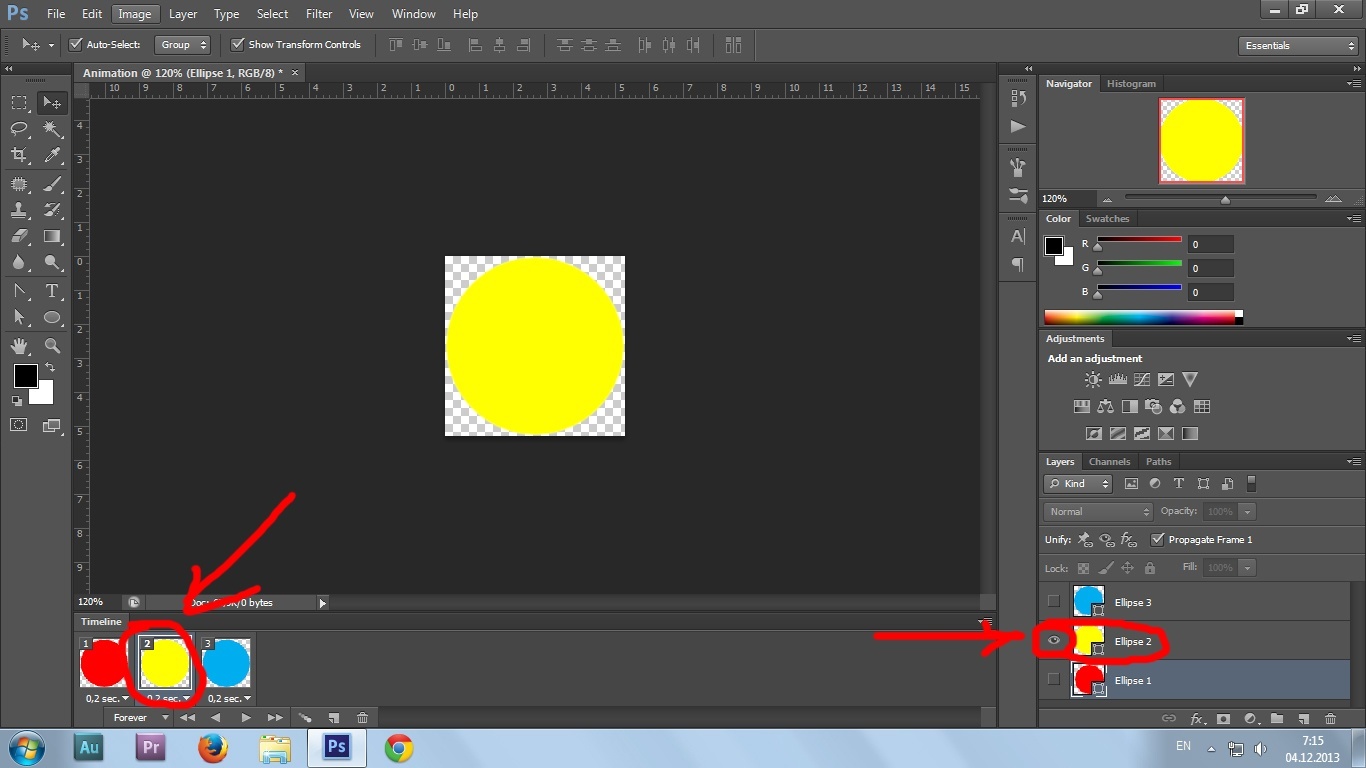
9. Matching Layer and Frame
Now, select Frame 1 from Timeline and select Layer 1 from the layer menu.
Deactivate Layer 2 and Layer 3.
Do the same with Frame 2 and Layer 2, Frame 3 and Layer 3.
Hint: When you are on a certain frame it will show all the visible layers.

10. Setting Frame duration
Set the time of each frame by clicking on an arrow below the each frame icon.

11. Play your animation
Click play button on the bottom of the Timeline menu bar.

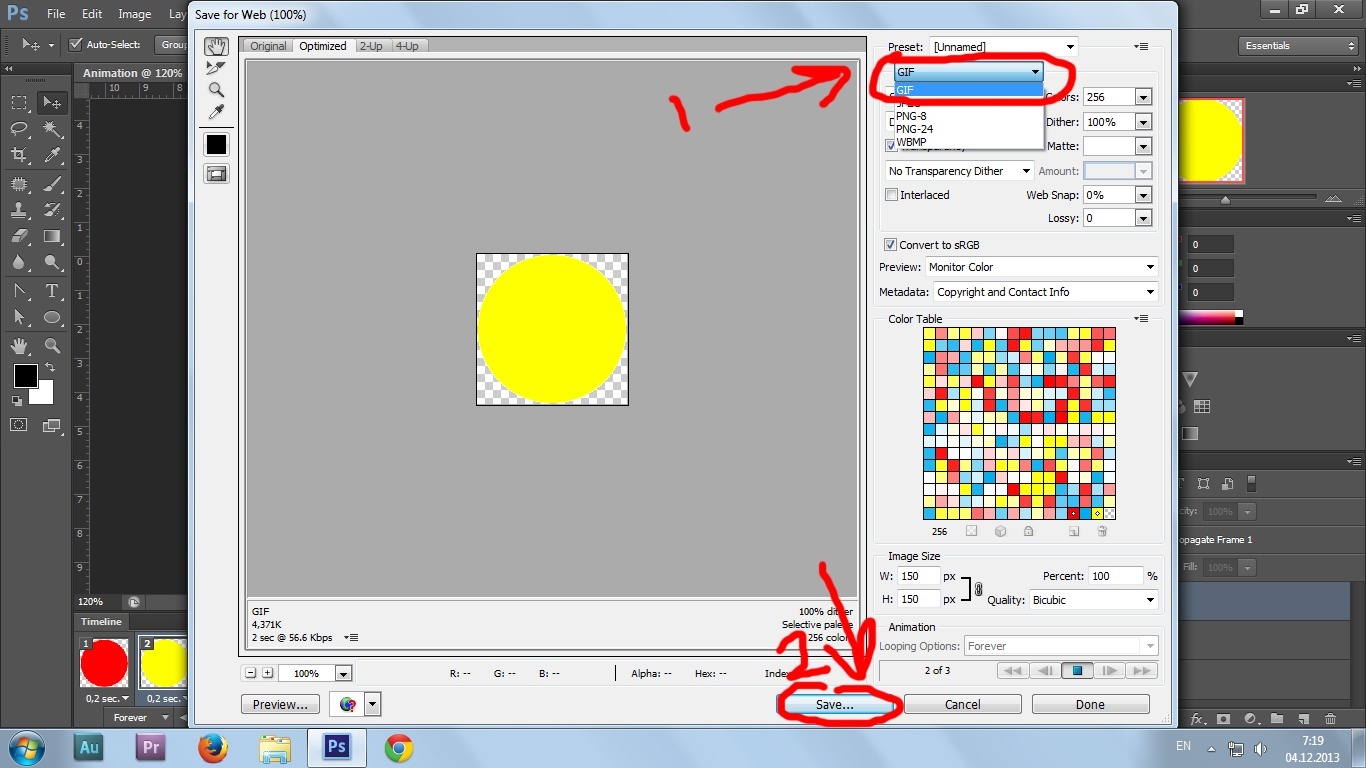
12. Saving animation in GIF
Save your animation.
File > Safe for Web

13. Saving settings
In the opened window, select GIF and Save.
14. See the result